Illustration and Visual Narrative - Final Project

/11/18 - 8/12/18 (Week 12 - Week 15)
Jasmine Teoh Lee Suan (0331993)
Illustration and Visual Narrative
Final Project: Front to Back to Forth - Webcomic
INSTRUCTIONS:
Assignment Brief
Week 12 (13/11/18)
I decided to create a webcomic based on a song, NCT U - Yestoday but only the second rap verse written by one of the rappers in that song, as it was a narrative or autobiographic lyrics of the rapper's life and how he sacrificed his past to have a successful future that he wanted. As the song was in Korean, I had to find the translation of it on https://colorcodedlyrics.com/2018/03/nct-u-yestoday-extended-ver-bonus-track.
 |
| Figure 1.1 Lyrics from NCT U- Yestoday |
For this week, I analyzed the song and did storytelling with the lyrics in my own explanations and point of view. I also tried to plan out the basic storyboard overview and the background, middle ground and foreground layers of the webcomic, while also watching many Madefire tutorials as our lecturer introduced that site for us to work on our webcomic.
 |
| Figure 1.1 Storyboard / Storytelling and Layers |
I made a timeline of the whole webcomic so that I could keep track of the storyline easily here.
 |
| Figure 1.2 Timeline |
Week 13 (20/11/18)
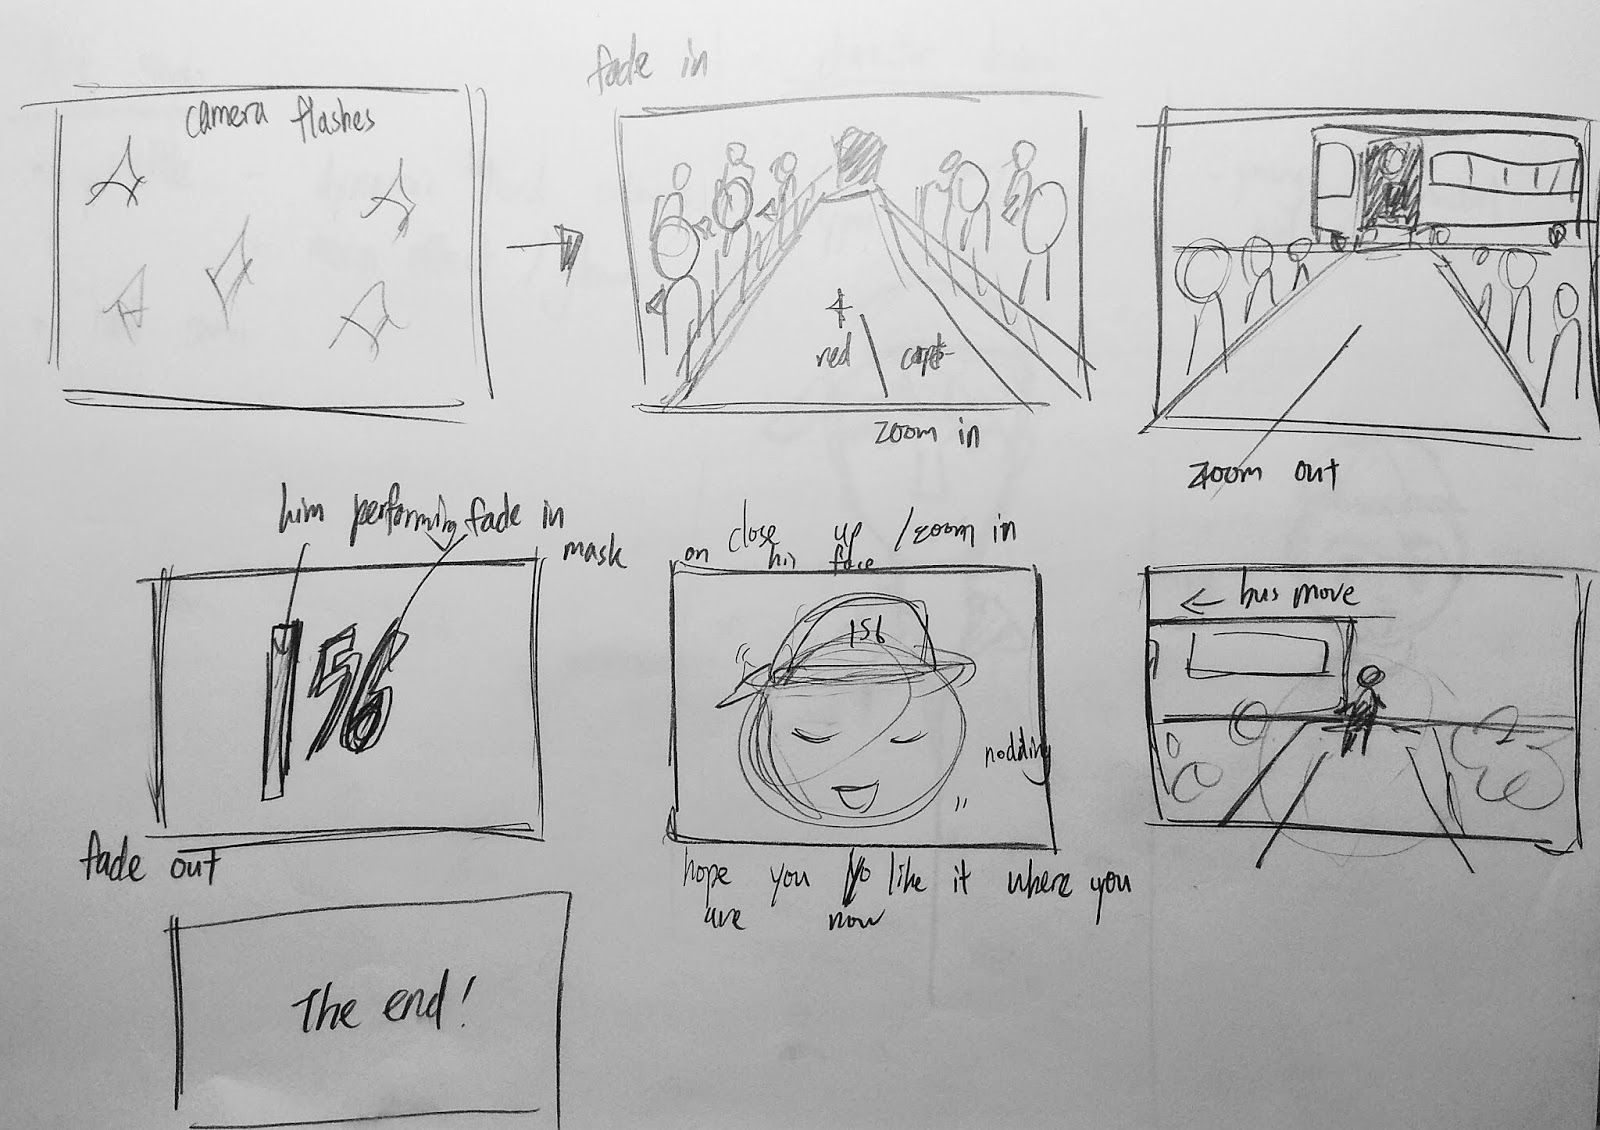
After getting feedback on my story planning and discussing with my lecturers on the possible transitions and styles I could come up with, I worked on my transition board where I drew each scene following the next. I more or less decided on the angles that I wanted and the way I wanted the scenes to change. Learning about Madefire's abilities the past week helped me as it ensured me on what I could do with it for my transitions.
I sketched my ideas down and wrote notes about the transitions and effects at the sides of each panel.
Transitions:
 |
| Figure 2.1 Transitions Sketch 1 |
 |
| Figure 2.2 Transitions Sketch 2 |
 |
| Figure 2.3 Transitions Sketch 3 |
 |
| Figure 2.4 Transitions Sketch 4 |
 |
| Figure 2.5 Transitions Sketch 5 |
I also wrote down some extra notes while planning the transitions, to follow up on my art style and the way I wanted my webcomic to look like.
 |
| Figure 2.6 Extra Notes / Art Style Sketch |
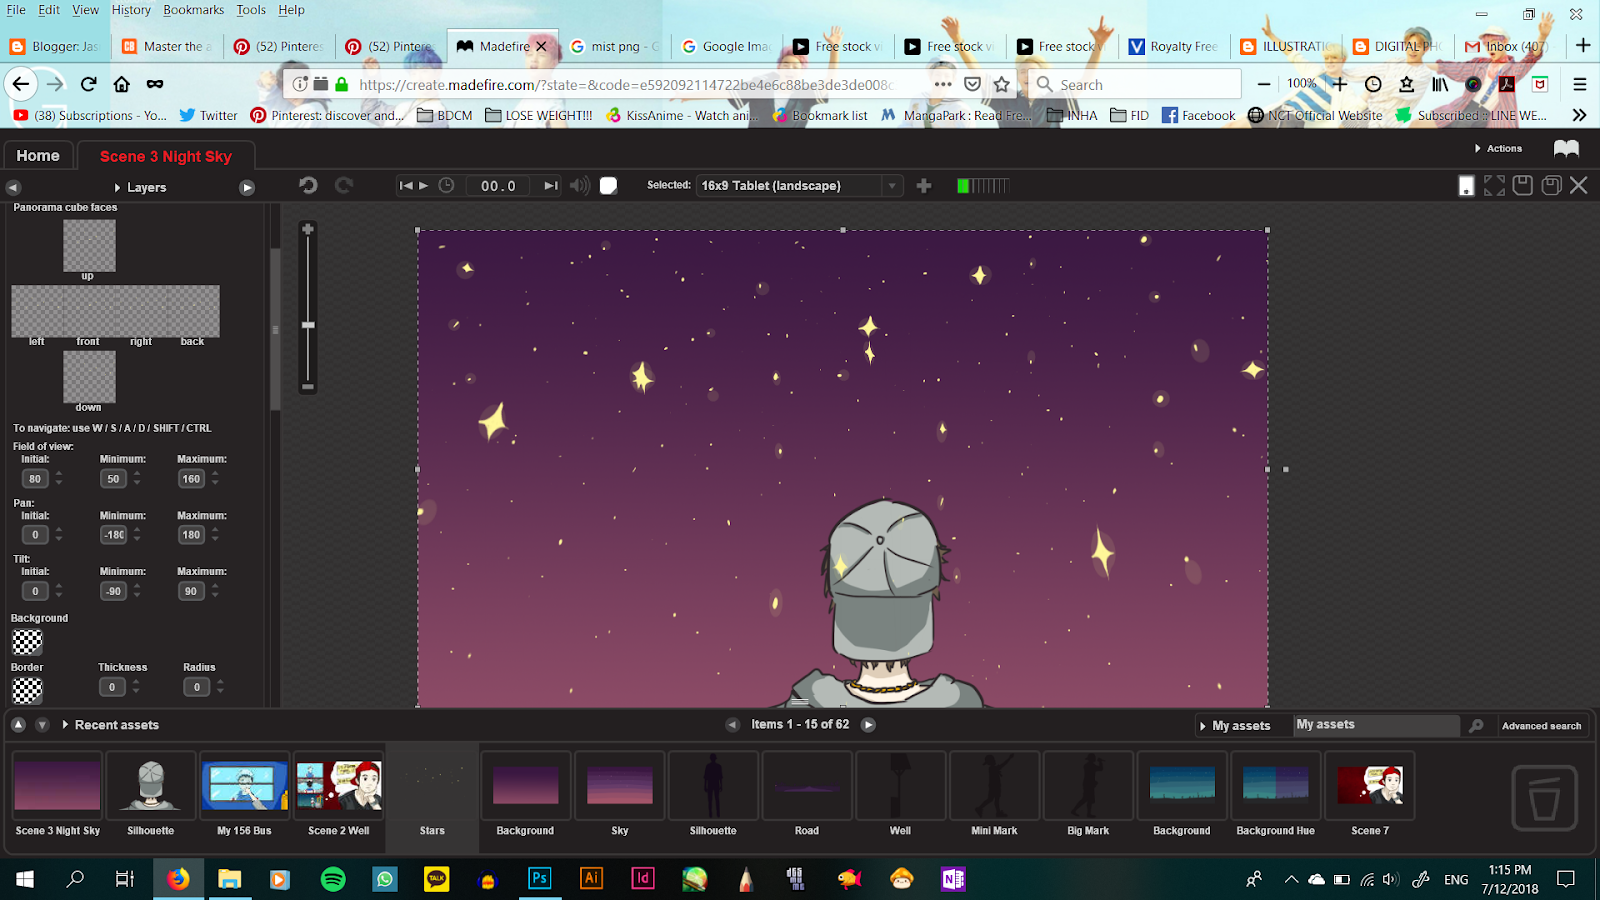
I also started doing mock-ups to test on Madefire, so that I wouldn't have a problem with my final graphics and assets later on.
 |
| Figure 2.7 Mock Up Drawn in Photoshop |
 |
| Figure 2.8 Mock Up Test in Madefire |
Week 14 (27/11/18)
I started working on the panels and assets for my webcomic his week. First, I looked for references and art styles that I liked and could research on and incorporate into my webcomic. I wanted to go for a more dynamic and clear style, with a pop modern palette for when my character is in the present, and a dreamy, harmonic and mellow palette and art style for when my character is reminiscing about the past.
Colour Palettes used:
 |
| Figure 3.1 Colour Palette |
As my story related to a real person's background story, I thought it would be a good idea to look up on how other people drew him. I also referenced a lot of fanartists and their art styles as I thought that their art is really cool.
Reference on Character and Art Style:
 |
| Figure 3.2 Art Style References |
After that, the dirty work started. I started drawing panel by panel, asset by asset, exporting the assets into png files so that I could transfer them to Madefire later and move them around with ease. Honestly, this process wasn't as bad as I thought and it was actually quite fun (except for the fact that I had to continue my work in a cruise ship because my parents booked for it way beforehand and I thought everything would end on the 26th so basically I was drawing the latter half of this webcomic on sea :")). But if you'd ask me to do this again for another storyline, I would.
Here are the assets that I drew one by one, RIP my hands:
 |
| Figure 3.3 Assets 1 |
 |
| Figure 3.4 Assets 2 |
 |
| Figure 3.5 Word Assets |
The assets I drew actually make up scenes, here's an example on the assets that turn into a scene:
This is my first scene, where there's 3 layers, a bus and clouds, the city and road, and the sky behind.
 |
| Figure 3.6 Sky (Background) |
 |
| Figure 3.7 Bus and Clouds (Foreground) |
 |
| Figure 3.8 City and Road (Middle Ground) |
I then compiled these three assets into one scene and it becomes like this:
 |
| Figure 3.9 Scene 1 |
My layers on Photoshop:
 |
| Figure 3.95 Layers |
These are some other scenes in my webcomic where my assets have been put together:
 |
| Figure 3.10 I think I'm Still the Same Scene |
 |
| Figure 3.11 Still Searching for My Galaxy Scene 1 |
 |
| Figure 3.12 Still Searching for My Galaxy Scene 2 |
** For Still Searching for My Galaxy Scene 2, I made it a panorama scene in Madefire, so that the reader could move the scene around by dragging the screen and zooming in and out using shift and ctrl, so that it would be interactive and convey the meaning of 'Still searching for my galaxy'.
 |
| Figure 3.13 Rap is My New 156 Scene |
There is also a scene which is made up a few scenes sliding in, so I had to draw the scenes first and later arrange them in Madefire. These are the scenes that I drew, and turned them into panels which made up one scene.
 |
| Figure 3.14 Eyes |
 |
| Figure 3.15 Past - Song Lyrics |
 |
| Figure 3.16 Past - Recording |
 |
| Figure 3.17 Mic |
 |
| Figure 3.18 Compilation of Panels on Madefire |
Week 15 (3/12/18)
After finishing with the drawing and creating all my assets, I moved everything to Madefire and started working on my webcomic's animation and effects. I had an even better time doing this and I really enjoyed seeing the effects work as how I wanted them to.
First of all, I categorized all my scenes into 6 main pages and points (from intro to ending). I then created a few scenes in a page, then strung them all together to form a project which I would upload as a motion book webcomic.
I made parallax scenes that move according to the mouse when you move it by controlling the foreground midground and background layers, container layers that I could control easily when I wanted to change scenes in a page, and even a panorama layer that gives an all around experience.
I also used effects such as scale, move, fade in, fade out, slide in, slide out, rotate, alpha, and highlight on my assets and scenes (for transitioning), and had to try several times so that I could get the exact effect I wanted for my assets. I also used tap points to determine when the reader should click to advance in my webcomic.
Working on Madefire:
 |
| Figure 4.1 Page 1 Scene 1 on Madefire |
 |
| Figure 4.2 Page 2 Scene 4 on Madefire |
 |
| Figure 4.3 Page 3 Scene 3 on Madefire |
 |
| Figure 4.4 Page 1 Scene 2 Being Dimmed on Madefire |
I recorded a video of the playback while editing on Madefire as well, just to show how it all works.
At some points, Madefire crashed and I had a sad time because I forgot to save at one part so I had to redo some stuff again. :") After that, I saved every time I did something new.
 |
| Figure 4.5 Errors on Madefire - Crashed |
There was also a time where I wanted to try uploading half of my webcomic just to so how it would be like but there was an error on it, so I decided to send a report to the people from Madefire.
 |
| Figure 4.6 Uploading on Madefire - Fail |
 |
| Figure 4.7 Completed Pages and Project on Madefire |
Finally, after many tries of uploading my motion book webcomic, failing and submitting a report to the madefire community for help, I finally managed to upload my webcomic and view it on Madefire.
 |
| Figure 4.8 Success on Uploading Webcomic |
It was a very long journey, but I made it!
Here's the link to my webcomic, there are some pages that have parallax motions where you can move the objects a little by moving your mouse, and also a panorama page where you can drag the page around and zoom in and out to view the surrounding of it.
MADEFIRE LINK: http://content.madefire.com/s-d316dedd26b94d1eba583b42011aefc8/index.html#
I also made a video of myself reading through the webcomic, as I thought that it would be another way to present my webcomic for those who are unable to read it through Madefire as it requires a desktop and flash player.
Watch the video on YouTube here: https://www.youtube.com/watch?v=yFC78prbSKE&t=61s and don't forget to click like and subscribe!

Comments
Post a Comment