Video and Sound Production - Exercises

1/4/19 - 13/5/19 (Week 1 to Week 7)
Jasmine Teoh Lee Suan (0331993)
Video and Sound Production
ExercisesInstructions:
Module Information Booklet:
Lecture Notes:
Week 1 (1/4/19)
We had a briefing on this module and what we would do for our assignments. Here are the notes that I took down:
 |
| Figure 0.5 Brief Notes |
Week 2 (8/4/19)
We had a lecture on cinematography, I took some notes down while the lecturers gave this lecture:
Types of Shots
1. Extreme Wide Shot (EWS)
- Surroundings
2. Wide Shot
- Includes the enture subject and important objects
- Viewer will know where it is
3. Medium Shots
- Leave a bit of head room
- See expressions, tell feelings
4. Medium Close Up
- Midway between waist and shoulders to above the head
5. Close Up
- Most important part in the movie
- Single out the single detail of the frame
- Head, small object
- Emphasizes facial expressions, object details
6. Extreme close up
- Magnifies the detail
7. Over the shoulder
- Dialogue scenes
- Using one actor as the foreground, while the other is talking
- Not necessarily over the shoulder of someone
- 180 degree rule
- Must keep the man on the right (?)
- Don't mix up / cross the line for the two objects or else it will be confusing
Premiere Pro
- Create new bin (like folder)
- New sequence
- DSLR 1080p25
Premiere Pro Tools
- Ripple edit tool
- Pen tool - create keyframe and adjust volume
- Editing - effect controls : can do zooming or position
- Effect transitions dip to black
Here are the slides used for the lecture:
Exercises:
Week 1 (1/4/19)
Jessica Jones Recreation Video
In the first week of class, we were taught the basics of Premiere Pro. We were given some video files shot by seniors, and were told to recreate a scene from the famous Marvel series, Jessica Jones. It was my first time using Premiere Pro, so I learnt a lot from this exercise. Below are the files used to edit the scene:
 |
| Figure 1.1 Jessica Jones Recreation Video Files |
I started off by transferring all the files into Premiere Pro, and put them into the correct sequence.
 |
| Figure 1.2 Screenshot of Jessica Jones Recreation in Premiere Pro |
I then cut the videos to what I needed using the mark in and mark out tools.
 |
| Figure 1.3 Screenshot of Jessica Jones Recreation in Premiere Pro |
After I was done, I exported the video.
 |
| Figure 1.4 Screenshot of Exporting Jessica Jones Recreation in Premiere Pro |
Here is the video of my first edit of Jessica Jones Recreation:
#FEEDBACK: Mr Martin said that the video editing is good for a first timer.
Week 2 (8/4/19)
We continued working on the Jessica Jones Recreation Video this week. Our target was to edit our previous video and cut the unnecessary framas until the video was under 55 seconds. From this exercises, I learned how to use all the basic tools.
Premiere Pro Tools that I used and learned:
- Select - To select on a file
- Ripple Edit - To edit to the part you want without discarding the footage
- Track Select Forward - To move all tracks easily in one go
- Razor - To cut the files
- Pen - To draw masks
- Hand - To move the content in the window
- Type - To add text
I tried to cut out all the unnecessary and redundant parts of the video.
 |
| Figure 1.5 Screenshot of Editing Jessica Jones Recreation under 55 seconds in Premiere Pro |
I also tried to layer the video and sound to overlap here.
 |
| Figure 1.6 Screenshot of Editing Jessica Jones Recreation under 55 seconds in Premiere Pro |
Finally, when I reached 55 seconds, I exported the video.
 |
| Figure 1.7 Screenshot of Exporting Jessica Jones Recreation under 55 seconds in Premiere Pro |
Here is the video of my second edit of Jessica Jones Recreation (under 55 seconds):
#FEEDBACK: Mr Martin said that my editing was okay and that I tried to overlap the sound and audio which was good.
Exercise 2: Ake Storyboard
Other than Jessica Jones, we worked on storyboarding a video from a Thai Ad this week. Below is the original video given to us, and we were given different themes of the video to storyboard. I got the edgy version.
I took screenshots of each scene and shot in the video, and put them into the storyboard template given by our lecturer. I then added the angles and actions that happened in the shot in the description below. Here's the pdf of my storyboard:
#FEEDBACK: No feedback was given for this exercise.
Week 3 (15/4/19)
Emo Ake Demo Reenactment Edit
This week, we edited a reenactment video of our seniors on the Ake Demo advertisment.
As usual, I exported the files and arranged the videos into the correct sequence. I then compared the original video to the footage I had and edited based on the original video. I got the hang of the premiere pro tools more after editing this video.
 |
| Figure 2.1 Screenshot of Emo Ake Demo Video Editing |
Here's the edit of the reenanctment video that I made:
#FEEDBACK: No feedback was given for this exercise.
Shooting Practice with different angles and shot sizes
We also studied on angles and shots more this week, after editing the ake demo video. We were split into a few teams and we borrowed the school's cameras to shoot 2-3 seconds worth of footage for each angle.
These are the footage files that my group shot for the compilation:
 |
| Figure 2.2 Screenshot of Shooting Practice Files |
I then moved all the files into premiere pro and edited the video.
 |
| Figure 2.3 Screenshot of Shooting Practice Video Editing |
Here is the video compilation of our group's shooting practice, edited by me. I decided to add music and transistions for it to make it look like a story.
Link to video: https://www.youtube.com/watch?v=TPeViFgHejw
Reflective Writing in shooting practice:
As most of the shots in this compilation had mostly still subjects, it wasn't that different from photography but if we had to shoot footage with actions and emotions and a direction, I think it would be way different from photography. In terms of composition, I think we have to keep in mind of the subjects and their movements, and which angles and shot sizes to use so that we can relay our message through or control the eye movements of the viewers most effectively. Different shot sizes bring forth different moods and highlight subjects differently as well.
For our 9 shots, the close up tele angle shot could have been better if we had a clear blur background instead of the bars behind. I found that the tripod is really important for videography as our hands tend to shake, even if we don't think so.
#FEEDBACK: Mr Martin said that the shots we took were good, and that we should transfer the files to each other asap so that we could start editing the video. He asked me what I thought about the difference between photography and filming as he was my photography lecturer during my foundation year.
Week 7 (13/5/19)
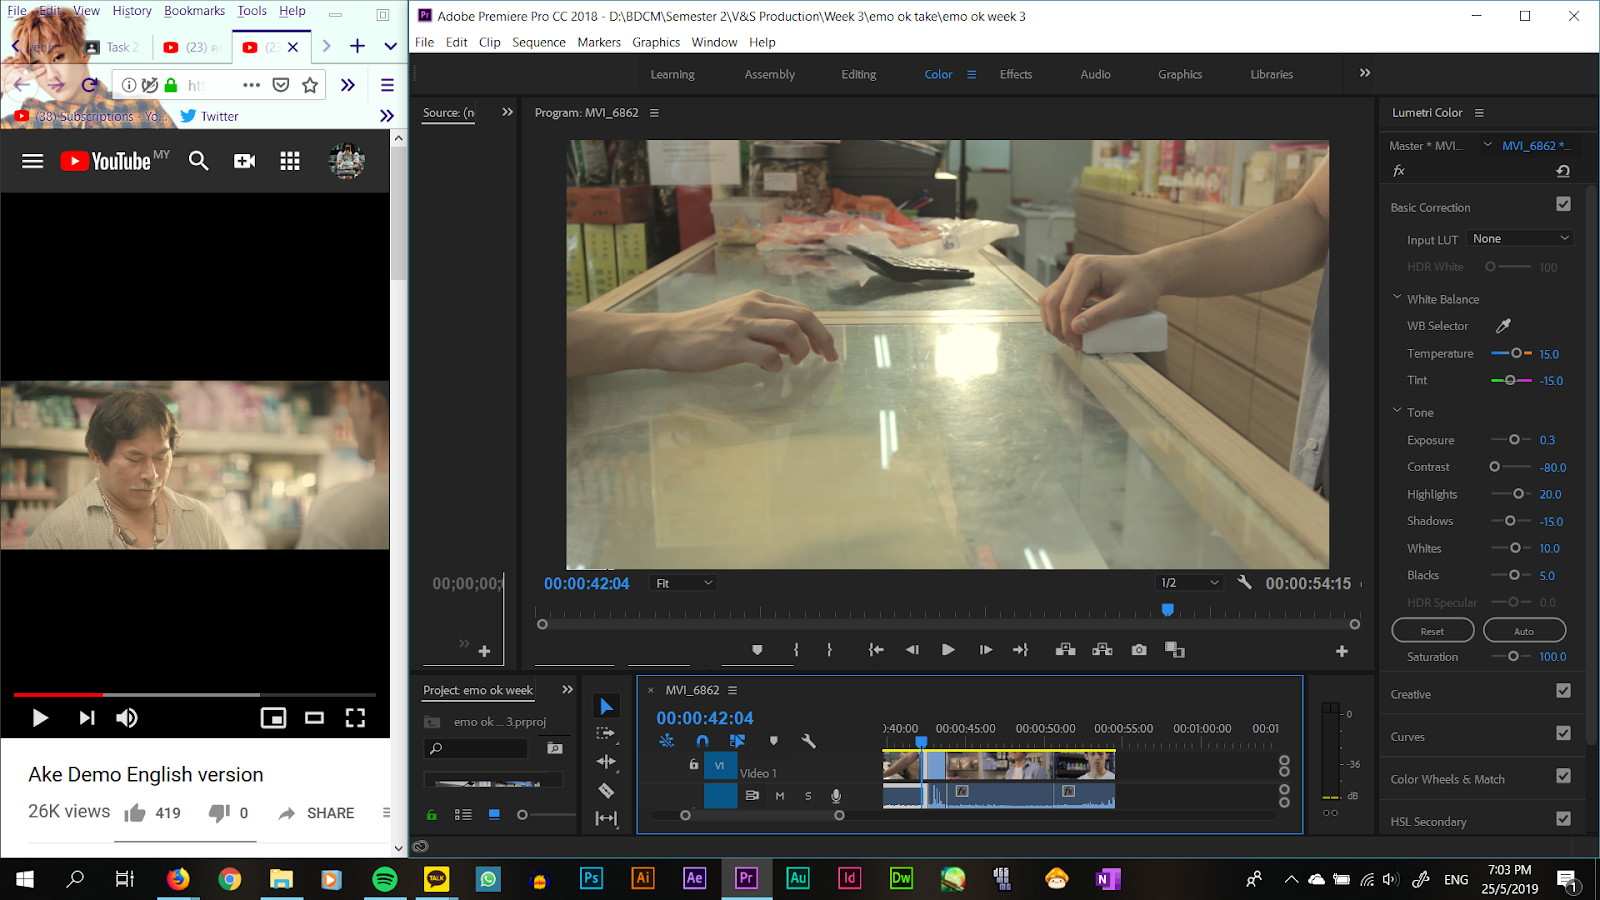
Ake Demo Video Colour Correction
For this week's exercise, we were told to use our edited video in Week 3 and to colour correct it using Premiere Pro. This is the reference photo used, taken from the original video:
 |
| Figure 3.1 Colour Correction Reference from Original Video |
I used the lumetri colour settings to edit my colour. The original video looked warmer and brighter, so I fixed the temperature to a warmer tone, while increasing the brightness and playing around with contrast, highlights, shadowm whites, and blacks of the video.
 |
| Figure 3.2 Screenshot of Colour Correction Editing with Comparison |
Process of colour correcting my video:
 |
| Figure 3.3 Screenshot of Colour Correction Editing with Comparison |
Comparison between the before and after of editing the colour in my video:
 |
| Figure 3.4 Screenshot of Colour Correction Editing Before and After |
Here's my final colour corrected edit of the Emo Ake Demo video:
#FEEDBACK: No feedback was given for this exercise.

Comments
Post a Comment